Asbestos removal during home restoration is a critical task that requires careful planning and safety measures. Homeowners must understand the risks associated with asbestos exposure and know how to assess their property for its presence. Proper preparation, safety gear, and removal techniques are essential to protect both health and the environment. Yet, many overlook the importance of post-removal procedures. Understanding these can make all the difference in ensuring a safe living space. What steps should one take next?
Key Takeaways
Conduct a thorough visual inspection of your home to identify potential asbestos-containing materials before starting any restoration work.
Use proper personal protective equipment (PPE) such as respirator masks, safety goggles, and protective clothing during the removal process.
Wet the asbestos materials before removal to minimize dust and airborne fibers, ensuring a safer work environment.
Seal removed asbestos in double-layer plastic bags, clearly labeled with “Asbestos” for safe transport to a licensed disposal facility.
After removal, perform a visual inspection and air quality testing to confirm that no asbestos fibers remain in the area.
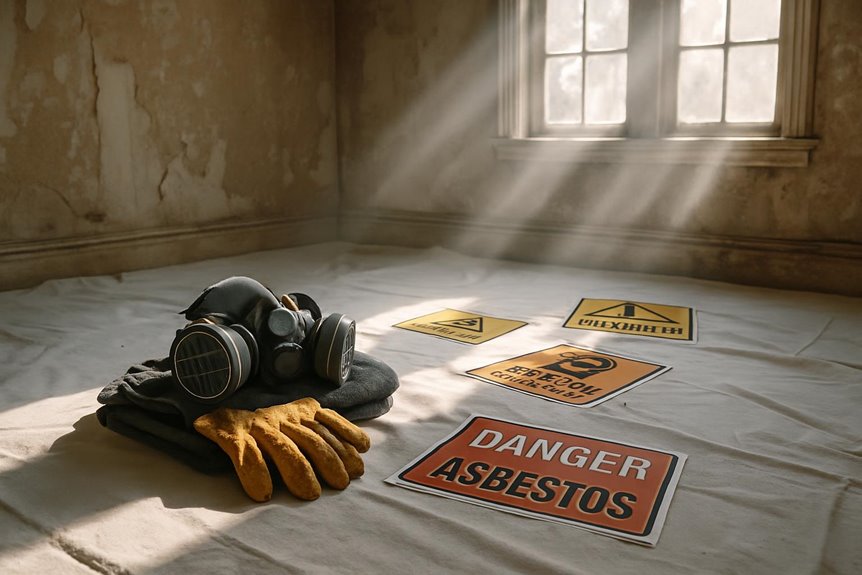
Understanding Asbestos and Its Risks
Asbestos, a naturally occurring mineral known for its heat resistance and durability, poses significant health risks when its fibers are inhaled.
There are several asbestos types, including chrysotile, amosite, and crocidolite, each with varying levels of danger.
Exposure to asbestos can lead to severe health effects, such as asbestosis, lung cancer, and mesothelioma. These diseases often develop silently over years, making early detection challenging.
For those who value their freedom and well-being, understanding these risks is vital. Taking proactive measures can help minimize exposure and guarantee a safer living environment.
It is important to recognize the presence of asbestos in older buildings and understand the potential consequences of disturbance during renovations.
Knowledge is a powerful tool in safeguarding health.
Assessing Your Home for Asbestos
Identifying potential asbestos in a home is a key step in ensuring safety and protecting health. Homeowners starting on renovations should be aware of the home renovation risks associated with disturbing materials that may contain asbestos.
Utilizing effective asbestos identification techniques is essential; this can involve visual inspections for suspicious materials, such as older insulation, ceiling tiles, and floor coverings. If any doubt arises, it’s wise to consult a professional who can conduct thorough testing. Following proper asbestos removal guidelines helps ensure a safe environment during the renovation process.
Awareness of these elements empowers homeowners to make informed decisions regarding their renovation projects. Taking the time to assess a home for asbestos not only safeguards personal well-being but also fosters a sense of freedom in pursuing restoration without fear of hidden hazards.
Preparing for Asbestos Removal
When homeowners decide to remove asbestos, proper preparation is essential to secure the safety of everyone involved. Creating a thorough pre-removal checklist helps guarantee that all necessary steps are taken before starting the project. This checklist should include items to create safe workspaces and minimize hazards.
Key preparations involve:
Sealing off work areas to prevent contamination.
Removing furniture and personal items from the vicinity.
Informing neighbors about the asbestos removal to keep them aware.
Assuring that all tools and materials needed for safe removal are readily available.
Taking these steps not only protects the individuals performing the work but also contributes to a healthier environment for everyone in the vicinity during the asbestos removal process.
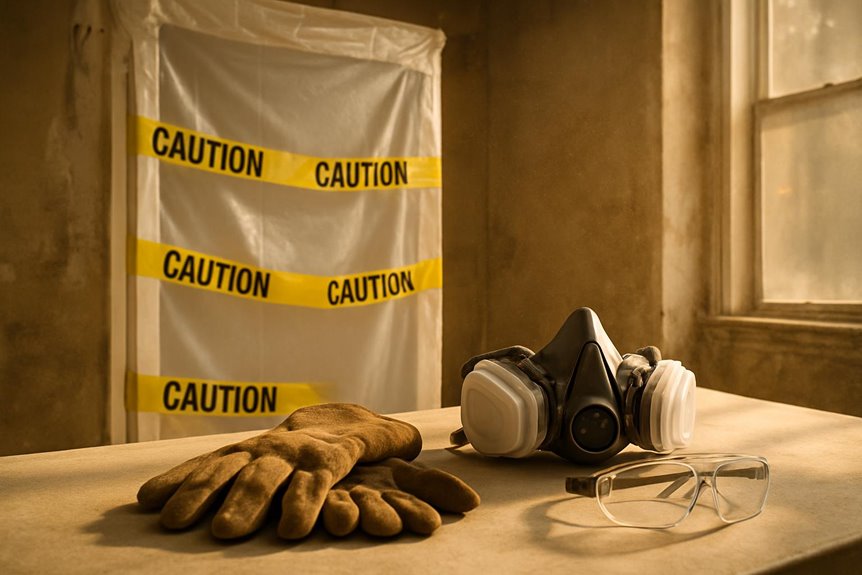
Essential Safety Gear for Asbestos Handling
To guarantee safety during asbestos handling, having the right protective gear is essential. Proper equipment not only safeguards health but also promotes peace of mind. Key items include durable protective clothing and high-quality respirator masks. These components work together to minimize exposure to harmful asbestos fibers.
Safety Gear
Description
Importance
Protective Clothing
Covers the body completely
Prevents fiber contact
Respirator Masks
Filters out airborne particles
Guarantees clean air intake
Safety Goggles
Protects eyes from irritants
Prevents eye exposure
Investing in these essential items creates a safer environment, allowing individuals to focus on the task at hand without unnecessary worry about potential hazards.
Proper Removal Techniques
Having the appropriate safety gear lays the groundwork for effective asbestos removal. Following established safety protocols is vital to guarantee a safe and successful project.
Several removal methods can be employed, each requiring careful execution.
Wet removal: This technique minimizes dust by dampening asbestos material before removal.
Hand tools: Using non-powered tools helps reduce the risk of airborne fibers.
Controlled environment: Removing asbestos in a sealed area can prevent contamination of surrounding spaces.
Personal protective equipment (PPE): Wearing masks and protective clothing is essential for worker safety.
Containment and Cleanup Procedures
When removing asbestos, establishing effective containment areas is critical to prevent the spread of harmful fibers.
Following proper cleanup techniques guarantees that any residual material is safely managed, while adhering to waste disposal guidelines is important for protecting the environment and public health.
Understanding these procedures is fundamental for anyone involved in the asbestos removal process.
Establishing Containment Areas
Establishing containment areas is essential for ensuring safety during asbestos removal, as it prevents harmful fibers from spreading to uncontaminated spaces. Properly constructed containment barriers are crucial in this process, utilizing effective sealing methods to minimize exposure.
To create secure containment areas, consider the following tips:
Use plastic sheeting to create physical barriers around the work area.
Seal all windows and doors with tape to prevent air leaks.
Establish a decontamination zone for workers to safely exit the area.
Employ negative air pressure units to filter any airborne particles.
Proper Cleanup Techniques
Effective cleanup techniques are vital for guaranteeing that asbestos removal sites are thoroughly decontaminated. During the asbestos remediation process, it is essential to implement safe handling practices to prevent any residual contamination.
Workers should don appropriate personal protective equipment (PPE) and use wet methods to minimize dust generation. After removing asbestos materials, all surfaces must be wiped down with damp cloths to capture any lingering fibers. A HEPA vacuum should be employed for final cleanup, confirming all areas are meticulously cleared.
Additionally, containment barriers should remain in place until all cleanup is verified, ensuring that no airborne particles escape. Following these procedures not only protects the workers but also guarantees a safer environment for everyone involved in the project.
Waste Disposal Guidelines
Proper waste disposal is essential in the asbestos removal process to secure safety and compliance with regulations.
Effective waste management practices guarantee that hazardous materials are handled appropriately. Homeowners must be aware of the following guidelines:
Seal all asbestos waste in durable, labeled bags to prevent contamination.
Transport materials to designated disposal sites that accept hazardous waste.
Follow local regulations regarding asbestos disposal, as they may vary by area.
Document the disposal process to maintain an accurate record and secure compliance.
Disposal Guidelines for Asbestos Materials
In regard to disposing of asbestos materials, following specific guidelines is essential to guarantee safety and compliance with regulations. Homeowners should be aware of local hazardous waste regulations and verify proper disposal methods are used. While asbestos recycling options are limited, some facilities may accept non-friable asbestos materials, promoting environmental responsibility.
Step
Action Required
Additional Notes
1. Identify Waste
Classify asbestos materials
Distinguish between friable and non-friable
2. Seal Materials
Use double-layer plastic bags
Verify bags are securely sealed
3. Label Clearly
Mark bags with “Asbestos”
Include warning symbols
4. Transport Safely
Use a covered vehicle
Minimize disturbance to materials
5. Dispose Properly
Deliver to a licensed facility
Confirm acceptance before transport
Post-Removal Inspection and Testing
After asbestos removal, a thorough post-removal inspection is essential to guarantee safety.
This involves a visual inspection checklist to identify any remaining materials and air quality testing to confirm that fibers are not present in the environment.
Visual Inspection Checklist
A thorough visual inspection checklist is vital for guaranteeing the safety and effectiveness of asbestos removal projects.
Following removal, it’s essential to identify any remaining hazards using visual indicators and appropriate inspection tools. A comprehensive checklist can help maintain safety standards and provide peace of mind.
Look for visible dust or debris from the removal area.
Inspect surfaces for signs of asbestos-containing materials that may have been missed.
Check for proper sealing and containment to prevent future exposure.
Confirm that all removal equipment has been properly cleaned and stored.
Air Quality Testing
Following a thorough visual inspection, the next step in ensuring a safe environment post-asbestos removal involves air quality testing.
This critical process measures airborne contaminants and identifies any lingering indoor pollutants that may pose health risks. Professionals typically conduct tests using specialized equipment to detect asbestos fibers and other hazardous materials.
The results provide a clear picture of the air quality, helping homeowners understand if their living spaces are safe for occupancy.
It’s essential to take this step seriously, as undetected pollutants can lead to long-term health issues. Ensuring good air quality post-removal not only fosters a sense of security but also empowers individuals to reclaim their homes with confidence and peace of mind.
Hiring Professional Asbestos Removal Services
When examining the complexities of asbestos removal, how can one guarantee safety and compliance with regulations? Hiring professional asbestos removal services is a vital step in ensuring that the process is handled correctly.
Here are some essential aspects to reflect upon:
Cost Considerations: Understand the potential expenses involved, including inspection, removal, and disposal fees.
Contractor Qualifications: Verify that the contractor holds necessary certifications and licenses specific to asbestos abatement.
Experience and Reputation: Look for contractors with a proven track record and positive customer feedback.
Safety Protocols: Inquire about the safety measures and protocols they implement to protect both workers and residents.
Frequently Asked Questions
How Can I Tell if My Home Has Asbestos?
To determine if a home contains asbestos, homeowners should consider professional asbestos testing and comprehensive home inspections. These methods provide reliable insights into potential hazards, ensuring informed decisions regarding safety and property maintenance.
What Should I Do if I Disturb Asbestos?
If asbestos is disturbed, immediate action is essential. One should prioritize asbestos identification and follow emergency procedures, which typically involve evacuating the area, contacting professionals, and ensuring safety to prevent inhalation of harmful fibers.
Is It Safe to Live in a House With Asbestos?
Living in a house with asbestos can pose serious health risks if disturbed. Asbestos safety during home restoration is essential; professionals recommend evaluating the situation and taking necessary precautions to guarantee a safe living environment.
Can I Remove Asbestos Myself?
The question of DIY asbestos removal raises significant concerns. Many individuals underestimate removal risks, potentially exposing themselves to harmful fibers. Professional assistance is strongly advised to guarantee safety and compliance with regulations, preserving health and well-being.
What Are the Health Effects of Asbestos Exposure?
Asbestos exposure poses significant health risks, including respiratory issues and various cancers. Symptoms often manifest years later, making awareness crucial. Understanding these risks empowers individuals to make informed decisions regarding their environments and personal safety.
Conclusion
In conclusion, tackling asbestos removal during home restoration requires careful planning and strict adherence to safety protocols. By understanding the risks, preparing adequately, and utilizing the right protective gear, homeowners can greatly reduce health hazards. Whether opting for DIY methods or hiring professionals, ensuring proper containment and disposal is essential for a safe living environment. Ultimately, prioritizing safety and thoroughness will lead to a successful restoration while safeguarding the well-being of everyone involved.
Asbestos removal is a crucial aspect of home restoration that requires careful planning and execution. The inherent risks associated with asbestos exposure necessitate a methodical approach to guarantee safety for all involved. This process includes identifying asbestos-containing materials, utilizing protective gear, and employing safe removal techniques. Understanding the nuances of each step is fundamental for successful remediation. The following guide provides important tips to navigate this complex task effectively.
Key Takeaways
Always conduct asbestos testing before starting home restoration to identify and assess the presence of hazardous materials.
Seal off affected areas securely to prevent the spread of asbestos fibers during removal.
Use appropriate Personal Protective Equipment (PPE), including respirators and disposable coveralls, to safeguard against exposure.
Employ safe removal techniques, such as wetting materials, to minimize airborne fibers and contamination.
Engage certified professionals for safe asbestos removal and ensure compliance with local regulations and safety protocols.
Understanding Asbestos and Its Risks
Although asbestos was once extensively utilized in construction and insulation materials due to its heat-resistant properties, its dangers became apparent as research revealed the serious health risks associated with exposure.
There are several asbestos types, including chrysotile, amosite, and crocidolite, each posing unique hazards. Prolonged inhalation of asbestos fibers can lead to severe health effects such as asbestosis, lung cancer, and mesothelioma.
These diseases often manifest years after exposure, raising concerns for those who may have unknowingly encountered asbestos in their homes or workplaces. Understanding the risks associated with various asbestos types is essential for individuals seeking to maintain their freedom from health complications.
Safe asbestos removal is crucial to minimize the risk of exposure during home restoration projects. Awareness and education empower homeowners to make informed decisions regarding potential asbestos-related hazards.
Preparing Your Home for Asbestos Removal
Before commencing asbestos removal, it is essential to assess the presence of asbestos in the home to determine the extent of the issue.
Affected areas should be securely sealed off to prevent contamination and protect the health of residents and pets.
Additionally, notifying all occupants about the removal process is vital for ensuring safety and preparedness during this critical time.
Assess Asbestos Presence
How can homeowners effectively determine the presence of asbestos in their residences?
To assess potential asbestos exposure, several asbestos testing methods are available. Homeowners can collect samples from suspected materials, such as insulation or flooring, and send them to a certified laboratory for analysis. It is essential to follow safety protocols during sample collection to minimize health risks.
Additionally, engaging a professional asbestos inspector can provide a thorough health risk assessment, identifying areas of concern and recommending appropriate actions. Understanding the presence of asbestos is imperative for ensuring a safe living environment.
Seal Off Affected Areas
To guarantee safety during asbestos removal, it is essential for homeowners to seal off affected areas effectively.
Implementing robust containment strategies is important to prevent asbestos fibers from spreading throughout the home. This involves using plastic sheeting to cover doorways, windows, and ventilation ducts, thereby creating a secure barrier around the work zone.
Additionally, ensuring proper workspace ventilation is crucial. Homeowners should use exhaust fans to direct air outside while minimizing airflow into unsealed areas.
These measures not only protect residents but also provide a controlled environment for the removal process. By taking the time to seal off affected areas properly, homeowners can greatly reduce health risks associated with asbestos exposure during restoration efforts.
Notify Residents and Pets
Once the affected areas have been sealed off, it is important for homeowners to notify all residents and pets about the upcoming asbestos removal. Clear communication guarantees everyone understands the potential risks and safety measures being implemented. This includes informing residents about the timeline and any necessary precautions they should take during the removal process. Additionally, pet safety must be prioritized; pets should be relocated to a safe environment away from the work zone.
Notification Type
Details
Importance
Resident Notifications
Inform about removal schedule
Guarantees awareness & safety
Pet Safety
Relocate pets during work
Protects health of pets
Communication
Use clear language
Avoids confusion
Emergency Contacts
Provide contact information
Quick response if needed
Essential Personal Protective Equipment (PPE)
When handling asbestos removal, the use of appropriate personal protective equipment (PPE) is vital for ensuring safety.
Respirators and masks are essential to filter airborne particles, while protective clothing provides a barrier against contamination.
Understanding the specific requirements for PPE can greatly reduce health risks associated with asbestos exposure.
Respirators and Masks
Effective respiratory protection is vital for anyone involved in asbestos removal, as even minimal exposure to asbestos fibers can pose serious health risks.
Various respirator types are available to guarantee adequate protection, including N95 masks and P100 respirators, which are designed to filter out hazardous particles effectively.
It is essential to adhere to mask standards set by regulatory bodies to confirm the respirator’s efficacy. Users should secure a proper fit to prevent any leakage, as improper use can compromise safety.
Regular maintenance and inspections of these devices are also necessary to make sure they remain functional.
Protective Clothing Requirements
Protective clothing serves as a critical barrier against asbestos exposure during removal projects. Adhering to established safety standards is vital when selecting appropriate protective gear.
Recommended attire includes disposable coveralls, gloves, and shoe covers, which help prevent contamination. The coveralls should be tightly fitted at the wrists and ankles to minimize any gaps where asbestos fibers could enter.
Additionally, it is advisable to use hoods or head coverings that are compatible with the coveralls to guarantee full coverage. When working in high-risk areas, double-layering protective gear may provide an extra layer of security.
Safe Removal Techniques for Asbestos
Although the process of asbestos removal can seem intimidating, employing safe techniques is vital for minimizing health risks.
Professionals recommend utilizing proven asbestos abatement techniques, which include wetting materials before removal to reduce airborne fibers. This practice helps to bind the asbestos, making it less likely to disperse during the process.
Additionally, implementing safe handling practices guarantees that workers minimize their exposure. This involves using proper tools, such as HEPA-filtered vacuums, and sealing materials in double bags to prevent contamination.
It’s also important to establish a containment area to limit access and protect others in the vicinity.
Proper Disposal Methods for Asbestos Materials
How can one guarantee the safe disposal of asbestos materials once they have been removed?
Adhering to local asbestos disposal regulations is essential. These regulations dictate specific procedures for handling and transporting asbestos waste to maintain public safety and environmental protection. It is vital to encapsulate the asbestos materials securely in leak-proof bags and label them as hazardous waste.
Utilizing licensed hazardous waste management services is recommended, as they possess the expertise and resources to dispose of asbestos in compliance with regulations. This not only assures safe disposal but also minimizes the risk of contamination.
Individuals should research local disposal sites to ascertain they are equipped to handle asbestos, thereby facilitating a responsible and compliant disposal process.
Post-Removal Cleanup and Air Quality Testing
Once asbestos materials have been removed, ensuring a thorough post-removal cleanup and conducting air quality testing are critical steps in safeguarding health and safety.
Neglecting these actions can lead to serious post-removal consequences, putting occupants at risk.
To effectively manage this process, consider the following steps:
Thorough Cleaning: Remove any residual dust and debris using specialized vacuums equipped with HEPA filters to capture microscopic asbestos fibers.
Surface Testing: Clean all surfaces, including walls, floors, and ducts, to eliminate any remaining contamination.
Air Quality Assessment: Engage a certified professional to conduct air quality testing, ensuring that the environment is safe for reoccupation.
When to Call in Professional Asbestos Removers
Determining when to call in professional asbestos removers can be vital for maintaining safety and compliance with regulations, especially in residential or commercial settings where asbestos exposure poses significant health risks.
Homeowners should seek professional help when asbestos materials are damaged, disturbed, or if they are unsure about their safety. Professionals possess the necessary qualifications and experience to assess and handle asbestos safely, ensuring adherence to stringent asbestos regulations.
If renovations involve potential asbestos exposure or if an inspection indicates the presence of asbestos, engaging certified experts is essential.
Frequently Asked Questions
Can I Remove Asbestos Materials Myself Without Professional Help?
Removing asbestos materials independently poses significant DIY asbestos risks, including exposure to harmful fibers. Additionally, legal considerations must be addressed, as regulations often require professional handling to guarantee safety and compliance with local laws.
How Long Does the Asbestos Removal Process Typically Take?
The asbestos removal timeline varies based on project size and complexity, typically ranging from a few days to several weeks. Adhering to safe removal practices guarantees efficient, effective results while minimizing health risks during the process.
What Are the Signs of Asbestos Exposure?
Signs of asbestos exposure include persistent coughing, shortness of breath, and chest pain. Individuals experiencing these asbestos symptoms face heightened exposure risks, emphasizing the importance of early detection and medical consultation to address potential health concerns effectively.
Is It Safe to Live in a House During Removal?
The safety of living in a house during asbestos removal often necessitates temporary relocation. Asbestos safety protocols dictate minimizing exposure, ensuring a healthier environment while remediation occurs, ultimately prioritizing the well-being of residents during the process.
How Much Does Professional Asbestos Removal Cost?
Professional asbestos removal costs vary widely, with asbestos removal pricing generally ranging from $1,500 to $3,000. Obtaining multiple removal service estimates can guarantee homeowners make informed decisions while balancing safety and budget considerations.
Conclusion
To summarize, prioritizing safety during asbestos removal is essential for successful home restoration. By understanding the risks, preparing adequately, and employing the right protective measures, homeowners can minimize exposure to hazardous materials. Utilizing certified professionals for testing, removal, and disposal guarantees compliance with safety regulations and promotes a healthier living environment. Ultimately, a cautious and informed approach will not only safeguard personal well-being but also enhance the integrity of the restoration project.
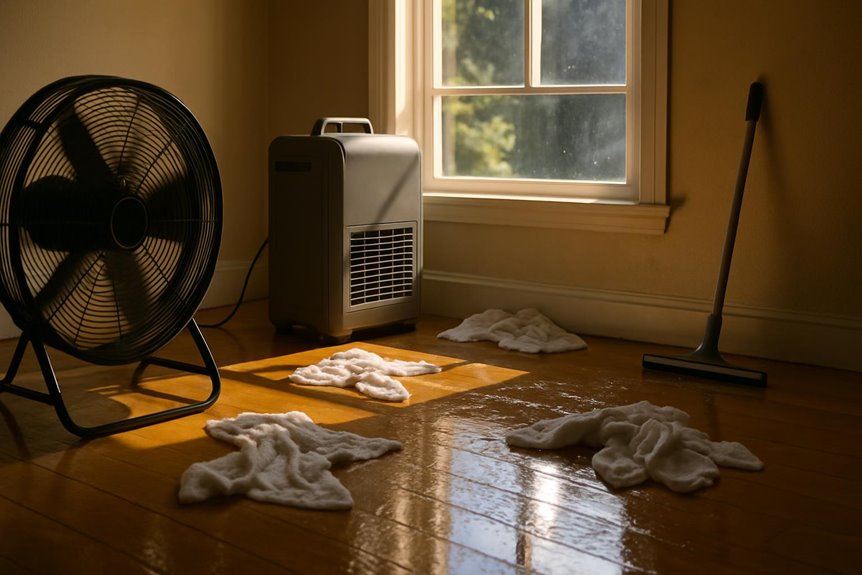
When a home suffers from flooding, effective drying methods are vital to prevent ongoing damage and mold growth. It begins with evaluating the extent of water damage and taking immediate steps to minimize moisture. From there, a combination of industrial drying equipment and natural techniques can be utilized to create an ideal drying environment. Understanding these methods can greatly impact the restoration process and ultimately save the home from further complications. What comes next is essential for homeowners facing this challenge.
Key Takeaways
Remove standing water promptly using pumps or buckets to initiate the drying process and prevent further damage.
Employ industrial dehumidifiers and air movers to effectively extract moisture from the air and promote evaporation.
Utilize natural drying techniques like sunlight exposure and cross-ventilation to aid in drying without solely relying on equipment.
Regularly monitor humidity levels with moisture meters, maintaining an ideal range of 30% to 50% to prevent mold growth.
Document and assess damage to personal belongings to determine restoration needs and prioritize drying efforts effectively.
Assessing the Extent of Water Damage
How can homeowners accurately determine the extent of water damage after a flood? A thorough damage assessment is vital for understanding the impact on the property.
Homeowners should begin by inspecting visible areas, such as walls, floors, and ceilings, for signs of discoloration, warping, or mold growth. Using a moisture meter can help identify hidden dampness in materials. Additionally, essential tips for handling water damage include checking for structural integrity to ensure the safety of the home.
It is equally important to check personal belongings, as water damage can compromise household items. Homeowners should document findings with photographs for insurance purposes.
Evaluating the situation promptly allows for informed decisions on necessary repairs and restoration efforts. By taking these steps, homeowners can regain control over their property and guarantee a comprehensive recovery process. Additionally, understanding the essential tips for effective restoration can further aid in making sound decisions during the recovery process.
Immediate Actions to Minimize Moisture
After evaluating the extent of water damage, homeowners need to take immediate actions to minimize moisture and prevent further issues. Effective water extraction is vital in this phase, as it helps reduce humidity levels and limits mold growth. Additionally, utilizing effective strategies for water damage cleanup can significantly enhance the restoration process. Implementing proper drying techniques is crucial to ensure the affected areas are thoroughly dried.
Here are some essential steps to keep in mind:
Action
Purpose
Tips
Remove standing water
Water extraction
Use buckets or pumps
Ventilate
Mold prevention
Open windows and doors
Dehumidify
Reduce humidity
Utilize fans or dehumidifiers
Dry belongings
Prevent mold growth
Spread items in sunlight
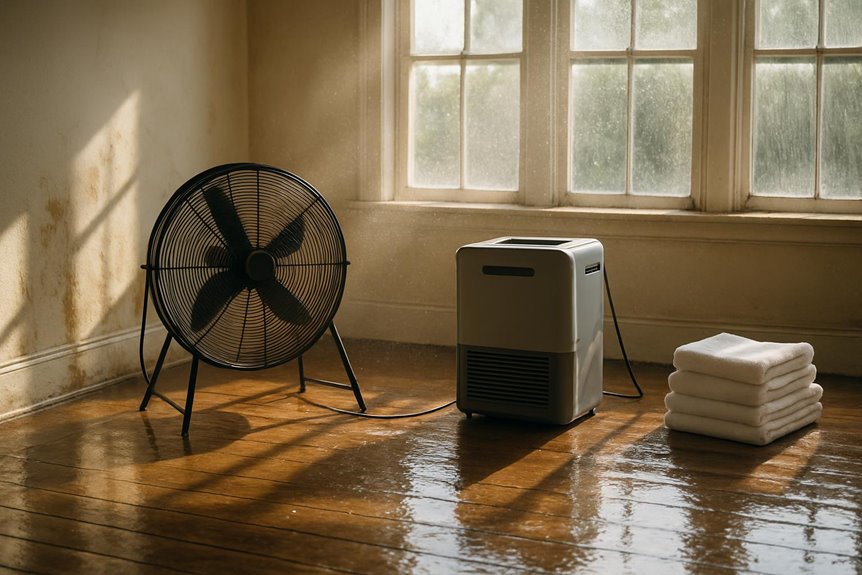
Utilizing Industrial Drying Equipment
Utilizing industrial drying equipment can greatly enhance the efficiency of moisture removal in flood-damaged homes. These specialized tools, such as industrial dehumidifiers and air movers, are designed to accelerate the drying process considerably.
Industrial dehumidifiers work by extracting moisture from the air, reducing humidity levels and preventing mold growth. Meanwhile, air movers facilitate airflow, promoting evaporation from surfaces and ensuring that moisture is effectively dispersed. This combination of top-tier water damage services is crucial for achieving optimal results in recovery efforts.
Together, these devices create an ideal drying environment, allowing homeowners to reclaim their spaces more swiftly. By investing in industrial drying equipment, individuals can take proactive steps toward restoring their homes, ultimately preserving their property and enhancing livability.
This approach offers both peace of mind and practical solutions for flood recovery. Additionally, employing effective strategies for water damage restoration can further improve the overall outcome of the recovery process.
Implementing Natural Drying Techniques
What natural methods can homeowners employ to effectively dry out a flood-damaged home?
Sunlight exposure is one of the most effective and accessible techniques. Opening curtains and blinds allows sunlight to penetrate and warm damp areas, facilitating evaporation.
Furthermore, enhancing airflow can greatly aid the drying process. Homeowners can achieve this by strategically placing fans or opening windows to create cross-ventilation. This encourages moisture to escape and dry surfaces more quickly. Implementing effective flood cleanup services can further expedite the restoration process.
By combining these natural methods, individuals can harness the power of nature to restore their homes without relying solely on artificial drying equipment.
These simple yet effective techniques empower homeowners to take control of the drying process, fostering a healthier living environment.
Monitoring and Maintaining Indoor Humidity Levels
Effective humidity control helps prevent mold growth and structural damage. Utilizing moisture meters can provide accurate readings of indoor humidity, guiding homeowners in their drying efforts. An ideal indoor humidity level is typically between 30% and 50%. If levels exceed this range, it may be necessary to deploy dehumidifiers or increase ventilation. Regularly checking humidity levels guarantees that the home remains a safe and comfortable environment. Homeowners should remain proactive and adjust their drying methods accordingly, as maintaining favorable humidity fosters a healthier living space and protects against future water damage. Additionally, monitoring humidity levels can help identify potential water intrusion issues before they escalate into more significant problems. Implementing effective drying methods can significantly enhance the overall restoration process and minimize the risk of mold development.
Frequently Asked Questions
How Long Does It Take to Dry a Flooded Home Completely?
The drying timeline for a flooded home varies based on factors like humidity and damage extent. A thorough moisture assessment helps determine the duration, typically ranging from several days to weeks for complete drying.
Will My Insurance Cover Flood Damage Drying Costs?
Determining whether insurance covers drying expenses for flood damage often depends on the specifics of the policy. Homeowners should review their insurance coverage details to understand potential reimbursement for associated drying costs after a flood.
Can I Stay in My Home During the Drying Process?
The decision regarding staying options during drying depends on drying safety. Homeowners should assess air quality and structural integrity. Consulting professionals can provide guidance, ensuring a safe environment while maximizing comfort and freedom during the drying process.
What Are the Health Risks Associated With Flood-Damaged Homes?
Flood-damaged homes pose significant health risks, primarily due to potential mold growth, which can lead to respiratory issues. Residents should be aware of these dangers to guarantee a safe living environment while addressing the aftermath of flooding.
How Can I Prevent Future Flooding in My Home?
To prevent future flooding, one should consider installing effective drainage systems and sump pumps. These measures help redirect water away from the property, providing homeowners peace of mind and enhancing their general living environment.
Conclusion
To summarize, effectively drying flood-damaged homes requires a combination of immediate actions and specialized equipment. By evaluating the extent of the damage, removing standing water, and employing industrial dehumidifiers, homeowners can greatly mitigate further issues. Incorporating natural drying techniques, such as maximizing airflow and sunlight, enhances the process. Regularly monitoring indoor humidity levels guarantees a safe, healthy environment, ultimately leading to a successful restoration and minimizing the risk of mold growth and structural damage.
Flooding can cause significant damage to homes, and knowing how to respond is essential. Various methods exist to dry out a flooded space effectively. High-velocity fans and dehumidifiers are just the beginning. There are also natural techniques and advanced systems that can speed up the drying process. Interested in discovering the best ways to tackle this challenge? Let’s explore some effective emergency drying methods that can make a real difference.
Key Takeaways
Utilize high-velocity fans to enhance air circulation and expedite moisture evaporation in flooded areas.
Set up industrial dehumidifiers to effectively remove excess moisture from the air and surfaces.
Employ natural drying techniques, such as solar drying and opening windows, to increase airflow and reduce humidity.
Use infrared drying systems for rapid moisture detection and efficient drying of materials post-flood.
Implement wet/dry vacuum extraction to remove standing water and debris for quicker drying times.
Use of High-Velocity Fans
High-velocity fans are essential tools for effectively drying out flooded homes. These powerful devices boast high velocity advantages, moving air rapidly to evaporate moisture trapped in carpets, walls, and furniture.
In terms of fan placement, positioning them strategically is key. Placing fans in areas with stagnant air or near wet surfaces maximizes their effectiveness. For instance, directing airflow towards the center of a room helps circulate air and speeds up the drying process.
Homeowners should also consider using multiple fans to cover larger spaces, ensuring no corner is left damp. With the right approach to fan placement, high-velocity fans can make a significant difference, restoring homes and freeing families from the stress of water damage.
Dehumidification Techniques
In terms of drying out a flooded home, dehumidification techniques play an essential role. Industrial dehumidifiers can work wonders by quickly removing excess moisture, while natural drying methods can be a great backup plan. Understanding the benefits of both approaches helps homeowners make informed choices to restore their spaces effectively. Additionally, utilizing moisture detection tools can significantly enhance the efficiency of the drying process. Furthermore, implementing water damage assessment is crucial in determining the extent of moisture and guiding the dehumidification strategy.
Industrial Dehumidifiers Benefits
Industrial dehumidifiers play an essential role in restoring flooded homes by efficiently removing excess moisture from the air and surfaces.
These machines are designed for industrial efficiency, making them perfect for tackling severe moisture issues that can arise during flooding. With their powerful capabilities, they help homeowners regain control over humidity levels, preventing mold growth and structural damage.
By providing effective moisture control, industrial dehumidifiers not only expedite the drying process but also guarantee a healthier living environment. They come in various sizes and capacities, allowing for tailored solutions based on the specific needs of each situation.
Ultimately, utilizing these dehumidifiers empowers homeowners to reclaim their space, providing peace of mind during a challenging time.
Natural Drying Techniques
Natural drying techniques offer an assortment of effective methods to help homeowners combat excess moisture after a flood. One popular approach is solar drying, which harnesses the sun’s power to evaporate water quickly.
By opening windows and placing wet items in sunlight, homeowners can boost the drying process while enjoying fresh air. Additionally, using materials with strong moisture absorption properties, like silica gel or activated charcoal, can considerably reduce humidity levels indoors. Employing dehumidification techniques can further enhance the drying process and prevent lingering dampness. Furthermore, it is essential to monitor indoor humidity levels, as high humidity can prolong the drying time and create an environment conducive to mold growth.
These methods not only promote a healthier living environment but also save on energy costs. Homeowners should remember that patience is key; allowing time for natural processes to work can lead to a drier, more comfortable home free from the dangers of mold and mildew.
Hot Air Drying
Hot air drying stands out as a practical solution for restoring flooded homes. This method relies on hot air circulation to effectively evaporate moisture from walls and floors. By utilizing fans and heaters, homeowners can achieve temperature control, ensuring ideal drying conditions.
Here’s a quick look at some benefits of hot air drying:
Benefit
Description
Ideal Conditions
Fast Drying
Evaporates moisture quickly
High humidity environments
Energy Efficient
Uses less energy than some methods
Moderate temperatures
Versatile Application
Suitable for various surfaces
Small to large areas
Wet/Dry Vacuum Extraction
In addressing the aftermath of flooding, wet/dry vacuum extraction emerges as another effective strategy for homeowners. This method utilizes specialized wet vacuuming techniques to remove standing water quickly and efficiently, making it a go-to for those looking to reclaim their space. Additionally, these vacuums are often designed for top-tier water damage services, ensuring that homeowners have access to professional-grade equipment.
By harnessing the power of extraction efficiency, these vacuums can handle both liquid and solid debris, ensuring a thorough clean-up. Homeowners can easily maneuver these machines to target problem areas, allowing for faster drying times. Plus, they can often be rented or purchased without breaking the bank, giving people the freedom to tackle water damage head-on. With the right approach, wet/dry vacuum extraction can be a game changer in the fight against flooding. Additionally, it is crucial to follow up with mold prevention strategies to ensure a safe and healthy environment after the cleanup.
Natural Airflow Enhancement
To enhance natural airflow in a flooded home, opening windows and doors can work wonders. It allows fresh air to circulate, helping to dry out damp areas more quickly. Additionally, using fans strategically can boost this effect, pushing moisture-laden air out and bringing in drier air from outside. Implementing natural airflow techniques is crucial for effective drying and minimizing long-term damage.
Open Windows and Doors
Opening windows and doors can greatly enhance airflow in a flooded home, making it a practical step in the drying process. By allowing fresh air to flow through, homeowners can promote cross ventilation, which helps to push out stale, damp air.
This natural airflow is essential for effective moisture control, as it reduces humidity levels and speeds up the drying of wet surfaces. Additionally, strategically opening windows on opposite sides of the house can create a breeze that lifts moisture-laden air away, making a noticeable difference in the drying time. Furthermore, proper moisture control is crucial to prevent secondary damage such as mold growth.
Utilize Fans Effectively
After letting fresh air circulate through the home by opening windows and doors, the next step involves harnessing the power of fans. Proper fan placement and airflow direction can greatly speed up the drying process.
Here’s how to make the most of your fans:
Positioning: Place fans in areas where water damage is most pronounced, ensuring they face toward the wet surfaces for ideal airflow.
Cross-Ventilation: Set up multiple fans to create a cross-breeze, pulling moist air out while pushing fresh air in. This method is crucial as efficient airflow can significantly reduce moisture levels in the environment.
Angle It Right: Tilt fans slightly upward to direct airflow towards the ceiling, where humidity tends to accumulate. Additionally, utilizing effective strategies for water damage restoration can further enhance the drying process.
Infrared Drying Systems
While traditional drying methods can be effective, infrared drying systems offer a modern approach that speeds up the process considerably. By utilizing infrared technology, these systems can penetrate materials, ensuring that moisture is detected and eliminated more efficiently. This method not only saves time but also reduces the risk of mold growth, giving homeowners peace of mind.
Here’s a quick comparison of drying methods:
Method
Speed
Moisture Detection
Traditional Fans
Moderate
Limited
Infrared Drying Systems
Fast
Advanced
Dehumidifiers
Slow
Basic
Natural Sunlight
Varies
None
Chemical Drying Agents
Infrared drying systems are just one of many tools available for tackling moisture after a flood.
Chemical drying agents can play an essential role in achieving effective moisture reduction and preventing long-term damage. These agents work through chemical absorption, helping to draw out moisture from affected materials.
Here are three popular chemical drying agents:
Silica Gel: Known for its moisture-absorbing properties, it can be used in small spaces to keep things dry.
Calcium Chloride: This compound is excellent for larger areas, effectively pulling humidity from the air.
Molecular Sieves: These highly porous materials trap water molecules, ensuring thorough drying.
Using these agents can provide homeowners with a sense of freedom and peace of mind in the aftermath of flooding.
Frequently Asked Questions
How Quickly Should I Start Drying After a Flood?
After a flood, swift action is essential for effective flood response. Ideally, the drying timeline should begin within 24 to 48 hours to prevent further damage, ensuring a healthier environment and preserving belongings for future enjoyment.
Are There Health Risks From Mold After Flooding?
After flooding, mold exposure can lead to various health symptoms, including respiratory issues and allergic reactions. It’s crucial to act quickly to minimize risks and guarantee a healthy living environment for everyone involved.
Can I Use My Home Appliances During Drying?
When considering appliance safety during drying, it’s essential to assess potential hazards. Using appliances while drying may be risky; alternative drying techniques, like fans or dehumidifiers, are often safer options to avoid electrical issues.
Should I Remove Furniture Before Drying Begins?
Before starting the drying process, furniture removal is essential. It allows drying equipment to work effectively and prevents further damage. Plus, it creates a more open space, making the whole process smoother and less stressful.
How Long Does It Usually Take to Dry a Flooded Home?
Typically, drying duration for a flooded home varies from a few days to weeks, depending on moisture levels and environmental conditions. Quick action can speed up the process, helping restore freedom and comfort sooner.
Conclusion
In the chaos of dealing with a flooded home, knowing the right drying methods can save the day and prevent long-term damage. By combining high-velocity fans, dehumidifiers, and natural airflow, homeowners can tackle moisture effectively. Plus, advanced techniques like infrared drying and good old-fashioned vacuum extraction play an essential role in cleanup. With a little effort and the right tools, getting your home dry again is totally achievable! Remember, quick action is key!